Getting started with Frontdoor
This guide shows you how to install and enroll the Frontdoor agent, verify connectivity, and then publish and share your service by mapping a public route to a target URL.
Create your first share
Follow these steps:
-
From the Frontdoor console, click the Shares tab from the sidebar.
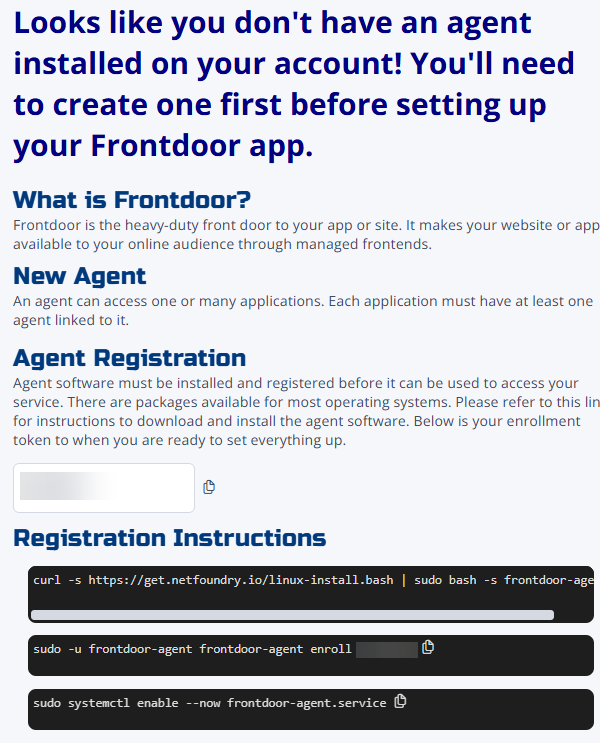
The console prompts you to create a new agent the first time you visit.
-
Use the provided registration instructions to install and enroll a new agent on a Linux-based VM or container.
Here's the confirmation message:

-
Click the Agents tab.
-
Click ... → Ping next to your newly created agent to verify environment connectivity.
This ensures the agent is healthy and can reach the fabric and your backend:

If the check passes, you're ready to publish your service.
-
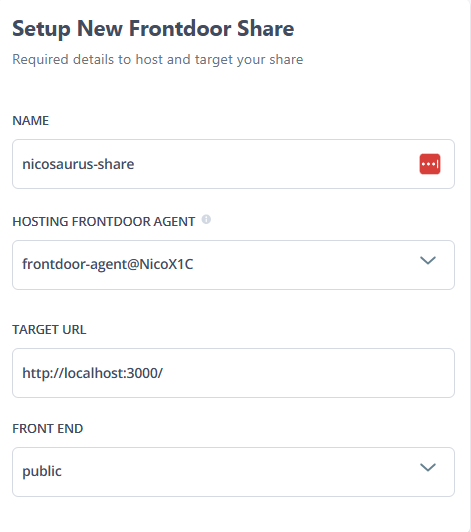
Click the Shares tab and then the + icon in the top-right to create a new share.
Creating a share maps a public route on your chosen frontend to your target URL.
-
Fill in the fields:
- Name: Enter a name used to access the share; must be alphanumeric and start with a letter.
- Hosting Frontdoor agent: Select the agent you created.
- Target URL: Enter the URL to the application or service you want to share; must be accessible from the agent you selected.
- Front End: Select the frontend (the default is public).
-
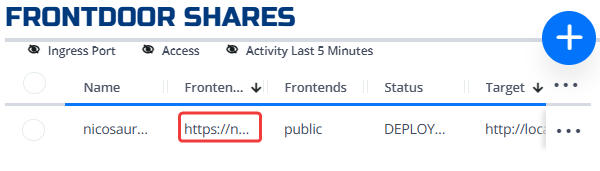
Click Create Share.
You're returned to the share list page, where you can click the Frontend Endpoint to access your share.
Troubleshooting
If you installed an agent but need to re-do the process, you need to reset your Linux service and reinstall the package to ensure your Linux host is pristine.
Run these commands:
V=0.1.8
sudo systemctl disable --now frontdoor-agent.service
sudo systemctl reset-failed frontdoor-agent.service
sudo systemctl clean --what=state frontdoor-agent.service
sudo apt update
sudo apt install frontdoor-agent=${V}\* --reinstall --allow-downgrades --yes
frontdoor-agent version
Now you can head back to step 1 of the getting started.